Showing posts with label hand mixed paints. Show all posts

13 October 2014

pigments&paints workshop


this is a workshop for the radical self-reliant artist: make your paints from sratch! all you need is terracotta bricks, egg and water! 
egg tempera paint has widely been forgotten because it can't be preserved (meaning can't be mass produced and sold). used by monks in the medieval times to paint the elaborated initials of bible transcriptions, it is a highly resistant paint that makes beautiful bright colours when applied in layers. recipe here: http://wunderkinderhongkong.blogspot.hk/2013/08/mix-it-yourself.html


discovering bricks and clays: 
there are endless variations of the colour 'burnt sienna': bricks found on the beach, ground into powder and bound with egg yolk, using water as a thinner. and the hues and tints of clays found in south lantau: ground into powder with a mortar and bound with egg yolk, using water as a thinner. 
further reading on 'burnt pebble beach red': http://liinaklauss.blogspot.hk/2013/03/burnt-pebble-beach-red.html


discovering plants:
the bright red flowers of 'sleeping hibiscus' (bot. malvaviscus) make a beautiful purple tone. leaves of malvaviscus when crushed in a mortar make a slimy green substance that can be applied directly onto paper without water nor binder. the leaves when mixed with water have the same quality as soap: foamy and slimy, they can serve as hair conditioner or shampoo. and as if that is not enough the petals of the malvaviscus flower are edible and make a highlight to every salad or desert!

you find more of my thoughts about colours here: http://liinaklauss.blogspot.hk/2013/03/the-real-thing.html

for further reading on the subject of making your own paints please refer to the following literature:
Cennino Cennini: 'The Craftsman's Handbook' / 'Il Libor dell'Arte' witten in the early 15th century, cennini reveals the secrets of the painter guilt with detailed instructions for egg tempera, under paintings, coatings etc: highly recommendable!
Victoria Vinlay: 'Colour' written by a SCMP journalist, vinlay tells personal stories as well as historical facts of paints and how they were invented, discovered, traded and used: good read!

8 August 2013

Passion for plants and paints


This is an art class involving two of my favourite topics: plants and paints! 
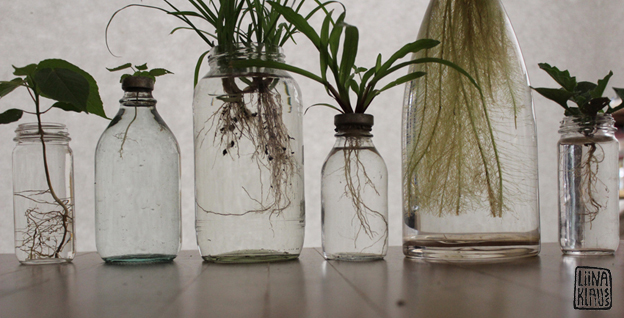
We're used to drawing plants from the ground up - but that's only half the picture, isn't it? Plants have roots which aren't less beautiful and just as diverse as the plant leaves themselves. Take a look at how well the children observed and drew their versions of the different roots and leaves. They first made a draft with pencil and then coloured the soil around the roots in, which was quite a challenge being a negative image!
Another amazing fact about these paintings is that the soil is actually painted with brown pigments retrieved from the earth, and that the leaves are actually painted with the green juice of leaves and grass! I will tell you about the recipe for these paints in my next blog entry - stay tuned:-)


1 August 2013

Mix it yourself!


These botanical paintings originated from two art sessions: one day we only drew roots of plants and the surrounding soil, the other day we did the stems and leaves of the plants. All you need to make the colours involved in these paintings is: soil, green leaves and an egg!


For the green: collect leaves and grass and put it all in a blender. Mix thoroughly with as little water as possible (not to thin down the chlorophyll pigments). Then sieve through a mesh - you receive a green juice which you can use for painting right away. Note: this colour is not light proof as the green from the chlorophyll will fade into a more brownish green (same as dry leaves:-)


For the brown: dig up some soil and add water until you get a nice brown mud pudding. Let it sit for a while to allow heavier particles (e.g. stones) to sink down. Scoop up the top of your mud pudding and sieve it through a mesh. The finer the mesh the smaller the pigments, which results in smoother paint. To make the soil stick to the paper, add one egg as a binder and mix thoroughly. E voilĂ ! Use as thick paint or thin down with water if you want a lighter tone. 

This is such a fun class! Children really enjoy being out in nature, observing, collecting, digging, sieving, mixing and getting dirty:-)
For me personally the most important message is that we already have everything we need. We are not condemned to buy readymade paints, we are able to actually create from scratch what we need: independent, imaginative and most of all, with so much fun!